How to start Development on React Native Step by Step
Manish Kumawat
Last Updated on: 29 September 2025
React Native is the leading framework for creating cross-platform mobile apps. It allows developers to create native apps for both iOS and Android using a single language, JavaScript. This greatly reduces development time and cost and eliminates the need to learn different programming languages for each platform, such as Java or Kotlin for Android and C or C++ for iOS. The popularity of React Native stems from its ability to create fully-functional mobile applications for multiple platforms using a single framework.
What is React Native?
React Native is a popular open-source JavaScript framework used to develop mobile applications for both Android and iOS operating systems. Developed by Facebook, React Native enables developers to create native mobile applications using JavaScript and the React library.
React Native is based on the same design principles as React, which is a JavaScript library for building user interfaces. It is used to create a rich user interface using components, props, and states. React Native also utilizes the same core architecture as React, making it easy to learn and use.
React Native is a great choice for developers who want to create native mobile applications without having to learn a new language. It is also a great choice for developers who want to create applications that are cross-platform compatible, as it can be used to create applications for both Android and iOS. Additionally, it is easy to learn and use, making it an ideal choice for developers of all experience levels.
How to start development on React Native
Here are the steps to start developing the best React Native app:
Install dependencies:
To begin developing a React Native app, the first step is to install the necessary dependencies. This can be done by using the command line interface to install the React Native CLI and the necessary packages. It is important to use a forceful polite tone when communicating with the command line interface, as this will help ensure that the installation process is successful. Once the dependencies have been installed, the next step is to create a React Native project and begin developing the app. An example is Node.js, React Native CLI, Xcode for iOS development, and Android Studio for Android development.

Steps to install dependencies in React Native:
Step 1:Navigate to your project's root directory in the terminal/command prompt.
Step 2:Run‘npm install’or‘yarn add’followed by the name of the dependency you want to install.
Step 3:For example, to install react-navigation, run‘npm install react-navigation’or‘yarn add react-navigation’.
Step 4:Repeat step 2 for each dependency you want to install.
Step 5:Run‘npm install’or‘yarn’to install all dependencies listed in your project's package.json file.
Step 6:To confirm installation, run‘npm ls’or‘yarn list’to see the list of installed dependencies.
Step 7:Import the installed dependency into your React Native component and start using it.
Start a fresh project utilizing the React Native Command Line Interface (CLI).
Let's get started with React Native! First, we'll create a new project using the React Native Command Line Interface. This is the first step in creating a great React Native app, and it's sure to be an exciting journey. Let's get started and see what amazing things we can create.
Steps to create a new project:
Step 1:Install React Native CLI globally:‘npm install -g react-native-cli’
Step 2:Create a new project:‘react-native init projectName’
Step 3:Change to the project directory:‘cd projectName’
Step 4:Run the app on Android:‘react-native run-android’or on iOS:‘react-native run-ios’
Navigate to the project directory:
Navigating the project directory in React Native is a critical step in the development process. It is essential that developers understand how to access the project directory in order to begin working on the project. To navigate to the project directory in React Native, open the command line interface and use the "cd" command to change the directory to the project folder. Once the command is executed, developers will be able to access the project directory and begin working on the project. It is important to remember that navigating to the project directory is the first step in the development process, so it is essential that developers understand how to do this correctly.

Steps to create:
Step 1:Activate the command prompt or terminal
Step 2:Use the‘cd’command to navigate to the desired directory.
For example‘cd ~/projects/myDirectory’(to navigate to a directory named "myDirectory" inside a directory called "projects" in your home directory).
Start the development server:
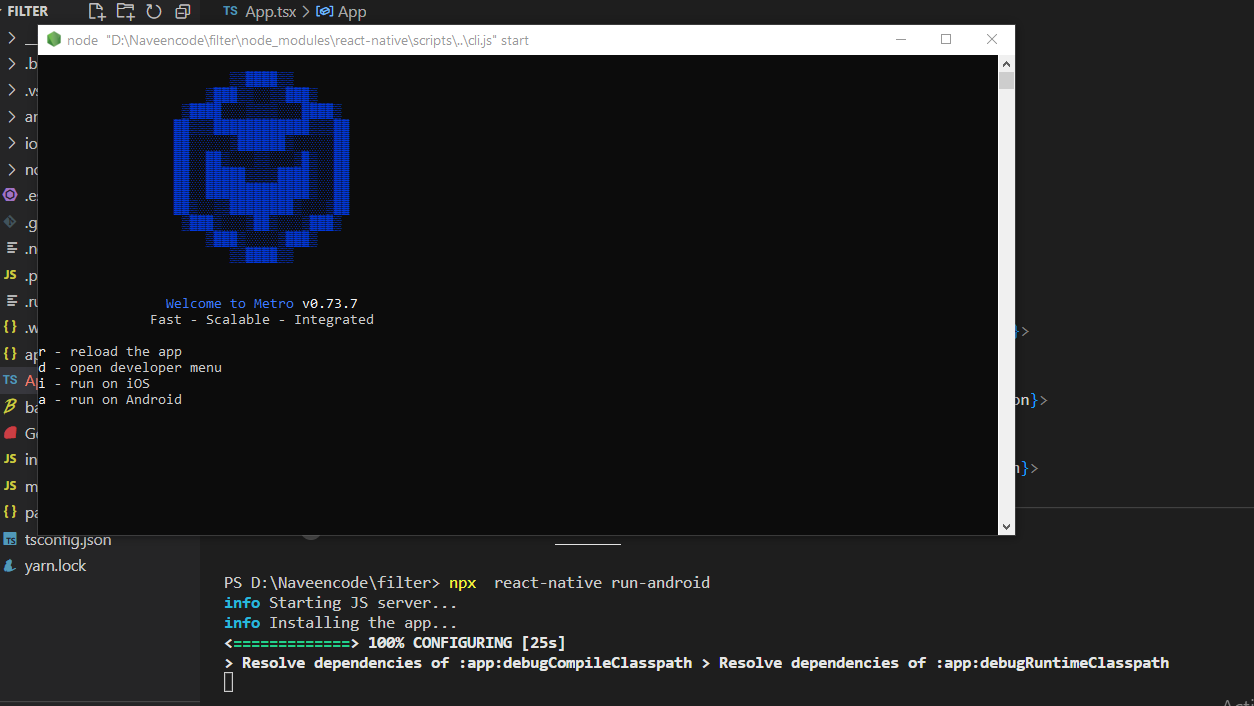
Starting the development server in React Native is an essential step in the development process. It is a command-line interface tool that enables developers to launch the app in the simulator or device. It also provides a local server to serve the JavaScript code and assets and enables developers to debug the app. This server must be started before running the app and can be done by using the command "react-native start" in the project directory. Failing to start the development server will result in an inability to run the app, so it is imperative that developers remember to start the server before running any React Native application.

Steps to start the development server:
Step 1:defineNavigate to the project folder in your terminal or command prompt.
Step 2:Run the following command:‘npx react-native start’
Step 3:Once the development server is started, you can run the app on an emulator or device by using the command:‘npx react-native run-android’(for Android) or‘npx react-native run-ios’(for iOS).
Step 4:To view the app in a development environment, open the emulator or connect your device and run the command from step 3.
*Note: Ensure that you have all the necessary dependencies installed, such as Node.js, Java Development Kit (for Android), Xcode (for iOS), and the React Native CLI.
Start building your app:
React Native is the perfect platform to start building your app. It is an open-source framework that allows developers to create native applications for both iOS and Android platforms using JavaScript and React. React Native provides a powerful set of tools and components that make it easy to create stunning, feature-rich mobile applications. With React Native, you can quickly and easily build high-quality apps that are optimized for performance, user experience, and scalability.
Steps:
Step 1:Install Node.js and React Native CLI on your development machine.
Step 2:Run the following command in your terminal or command prompt:‘npx react-native init [ProjectName]’to create a new React Native project. Substitute'[ProjectName]'with your preferred name for the project.
Step 3:Navigate to the newly created project directory using the command‘cd [ProjectName]’.
Step 4:To run the app on an Android emulator or device, use the command‘npx react-native run-android’. For iOS, use‘npx react-native run-ios’.
Step 5:Open the file‘App.js’in your text editor, this is the main component of your app. You can start building your app's UI and functionality in this file.
Step 6:To add third-party libraries, use the command‘npm install [library name]’or‘yarn add [library name]’.
Step 7:Run the app on an emulator or device again using the command from step 4 to see the changes you made.
Step 8:Repeat steps 5-7 until your app is complete.
*Note: Before starting, make sure you have all the necessary dependencies installed, such as Java Development Kit (for Android), Xcode (for iOS), and a text editor.
Use an emulator or actual device to test the app.
Testing an app on an emulator or physical device in React Native is an essential step in the development process. It is the only way to ensure that the app is functioning as expected and that any bugs or errors are identified and addressed. Failing to test an app on an emulator or physical device can lead to serious issues that can cause the app to crash or malfunction. It is therefore imperative that developers take the time to thoroughly test their app on an emulator or physical device before releasing it to the public.
Steps:
To test your React Native application on an emulator or physical device:
Step 1:Connect the device to your development machine or launch an emulator
Step 2:Navigate to your project directory using the terminal or command prompt.
Step 3:Run the following command to build and run the app on an Android device or emulator:‘npx react-native run-android’.
Step 4:To run the app on an iOS device or emulator, use the command:‘npx react-native run-ios’.
Step 5:Once the app is built, it will automatically launch on the connected device or emulator.
Step 6:Use the device or emulator to test the app's functionality and behavior.
Step 7:Repeat the testing process as necessary to ensure that the app is working correctly on the target platform.
*Note: Make sure to have all necessary dependencies installed, such as Java Development Kit (for Android), Xcode (for iOS), and a connected device or emulator
Repeat Points 5 and 6 until your app is complete:
Repeat steps 5 and 6 until your app is complete in React Native! Keep going until the task is finished! Keep going until you have achieved the desired outcome. Do not be satisfied with anything less than a fully functioning app. Keep pushing forward and do not give up until you have reached your goal.
Publish your app to the app store (iOS) or Google Play Store (Android).
Publishing your React Native application to the App Store (iOS) or Google Play Store (Android) is an essential step in making your app available to the public. It requires a thorough understanding of the process and proper preparation to ensure a successful launch. You must configure your app for the specific platform, create an account with the store, and submit your app for review. Once approved, you can publish your app to the store and make it available to users. Failure to properly prepare and submit your app can lead to long delays and costly mistakes.
*Remember, React Native allows you to build native mobile apps using JavaScript and React, so having a good understanding of those technologies will be helpful.
Conclusion
In conclusion, starting development on Native React step by step is a great way to become the best React Native developer. It is important to begin by understanding the basics of React, such as components, props, and state. Once these concepts have been mastered, it is important to move on to learn more advanced topics such as navigation and styling. Finally, it is essential to practice coding and building apps to become proficient in React Native. With dedication and hard work, anyone can become a React Native developer for React Native Development.
At Fulminous Software Our experienced team of developers will guide you through the process, ensuring that you get the best results possible. We will provide you with the necessary tools and resources to get started, including the React Native CLI and the Expo SDK. Our team will also help you set up your environment, create a project, and build your first app. With our expertise, you can be sure that your React Native development journey will be a success.
HIRE A TOP SOFTWARE DEVELOPMENT COMPANY

Manish Kumawat is the co-founder at Fulminous Software. He is an expert at writing about technical stuff in the IT world. Imagine making the most complicated tech things easy to understand - that's what he do. But that's not all. He has developed and honed the company’s vision, corporate structure & initiatives, and its goals, and brought the company into the current era of success.


Partner with Top-Notch Web Application Development Company!
Discuss your Custom Application Requirements on info@fulminoussoftware.com or call us on +1-903 488 7170.
15 Days Risk-Free Trial